Pod Cast 「物理法則で現実を再構築する」
本題の前に、研究中のPBR(Physically Based Rendering)、
AI画像生成における物理原理レンダリングについて音声での解説データを公開します。
このサイトはどこに向かっているのか?
Google Deep MIndによる Deep Live、対談形式の音声でお伝えいたします。
次の音声ファイル日本語版(18分13秒)、英語版(17分31秒)をお楽しみください。
ここから今日の本題に入ります
前の「画像生成の完成度を高めるためのカラーコード変換ツール – その使い方」と同じく、
中級〜上級向けに「プロンプトだけでどこまで構図・照明(光の効果など)を操れるか」を中心にまとめました。
Google Nano Banana 2
→上記画像生成のためのJSON Scheme Code: コードは注意してご使用ください。
{
“$schema”: “http://json-schema.org/draft-07/schema#”,
“title”: “Patek Philippe Watch Configuration”,
“description”: “JSON Schema for configuring colors in the Patek Philippe watch image generation prompt for Nano Banana 2, with slider support for color adjustments (e.g., via RGB/HSV sliders in UI implementations). Colors are represented as HEX strings, but UI can map to sliders for R, G, B (0-255) or HSV components.”,
“type”: “object”,
“properties”: {
“dial_color”: {
“type”: “string”,
“description”: “Deep blue dial color. Supports HEX format. UI: Implement as color picker with RGB sliders (R:0-255, G:0-255, B:0-255).”,
“default”: “#3e4f65”,
“pattern”: “^#[0-9a-fA-F]{6}$”,
“x-ui-widget”: “color-slider”
},
“case_color”: {
“type”: “string”,
“description”: “Gold case color. Supports HEX format. UI: Implement as color picker with RGB sliders.”,
“default”: “#ba9772”,
“pattern”: “^#[0-9a-fA-F]{6}$”,
“x-ui-widget”: “color-slider”
},
“strap_color”: {
“type”: “string”,
“description”: “Brown alligator leather strap color. Supports HEX format. UI: Implement as color picker with RGB sliders.”,
“default”: “#51342c”,
“pattern”: “^#[0-9a-fA-F]{6}$”,
“x-ui-widget”: “color-slider”
},
“hands_color”: {
“type”: “string”,
“description”: “Golden hands with luminous coating color. Supports HEX format. UI: Implement as color picker with RGB sliders.”,
“default”: “#c3bfb5”,
“pattern”: “^#[0-9a-fA-F]{6}$”,
“x-ui-widget”: “color-slider”
},
“text_color”: {
“type”: “string”,
“description”: “Gold letters for brand name color. Supports HEX format. UI: Implement as color picker with RGB sliders.”,
“default”: “#a6917a”,
“pattern”: “^#[0-9a-fA-F]{6}$”,
“x-ui-widget”: “color-slider”
}
},
“required”: [“dial_color”, “case_color”, “strap_color”, “hands_color”, “text_color”]
}
→自然言語によるプロンプト例(英日併記)コードは注意してご使用ください。
以下、自然言語によるプロンプト例(英日併記)このケースでもそれなりの出力は得られますが、意図した精緻で正しい色彩、自然な雰囲気の画像生成は望めませんでした。
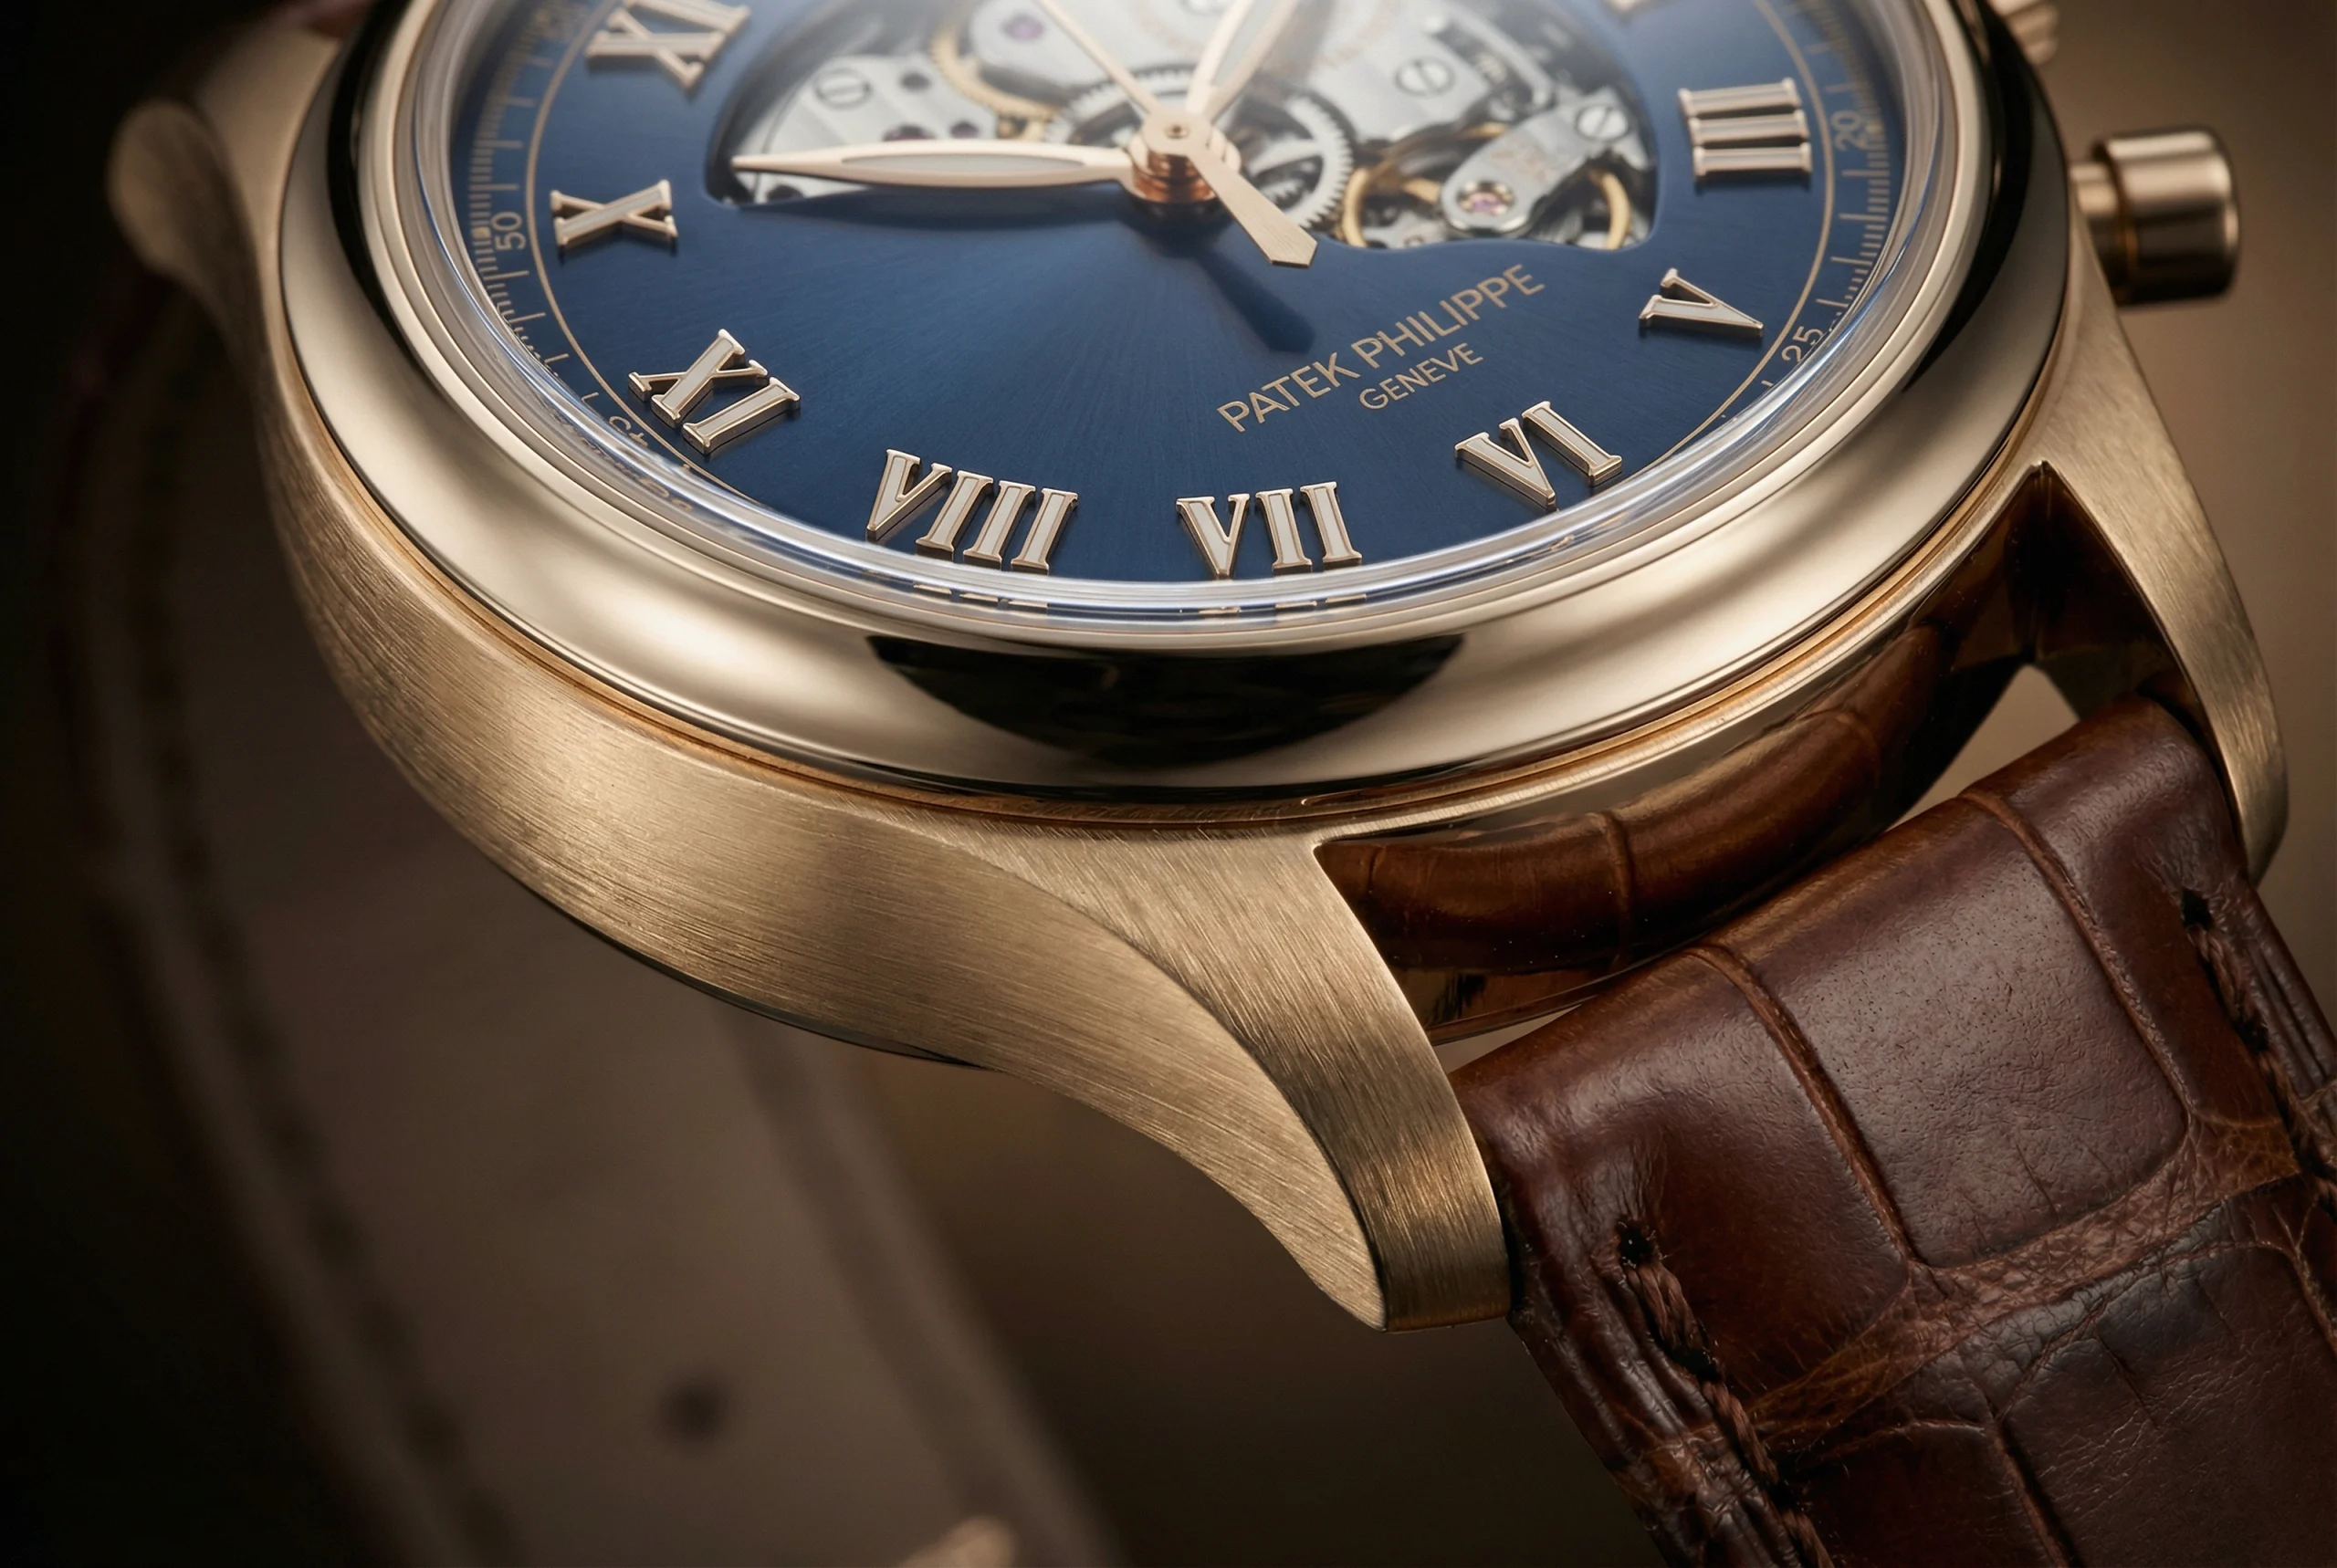
A close-up shot captures the intricate details of a luxurious Patek Philippe watch with a deep blue dial(hex, #3e4f65), gold case(hex, #846344), and brown alligator leather(hex, #51342c) strap.
The image showcases a high-end Patek Philippe wristwatch, angled slightly to the right, highlighting its exquisite craftsmanship. The watch features a polished gold case(hex, #ba9772) with a brushed finish on its sides, giving it a subtle texture. The lugs seamlessly connect to a rich, dark brown alligator leather strap(hex, #51342c) , which exhibits a distinct, natural scale pattern and fine stitching. The dial is a striking deep blue(hex, #3e4f65), with a sunburst finish, catching the light in a radial pattern. Gold-colored Roman numerals, notably VIII, VI, and V, are prominently displayed, elevated from the dial surface. The watch also features golden minute and hour hands with a luminous coating(hex, #c3bfb5) in the center. Part of the watch movement, including gears and mechanisms, is visible through an open-heart design on the upper part of the dial, revealing its complex inner workings. The brand name "PATEK PHILIPPE GENEVE" is elegantly inscribed in gold letters(hex, #a6917a) below the center of the dial. A subtle minute track with small indicators runs along the outer edge of the dial. The overall atmosphere is one of sophistication and luxury, emphasizing precision engineering and elegant design. The lighting is soft but directed, creating subtle reflections on the polished surfaces and highlights on the textured elements, enhancing the watch's premium feel.
クローズアップショットが、深みのある青の文字盤(16進数 #3e4f65)、ゴールドケース(16進数 #846344)、茶色のワニ革ストラップ(16進数 #51342c)を備えた豪華なパテックフィリップ時計の精巧な細部を捉えます。
高級パテック・フィリップ腕時計を右向きにやや傾けて撮影。卓越した職人技を際立たせている。ケースはポリッシュ仕上げのゴールド(#ba9772)で側面はブラッシュ加工により繊細な質感を表現。ラグは深みのあるダークブラウンのアリゲーター革ストラップ(#51342c)にシームレスに接続され、自然な鱗模様と精巧なステッチが特徴的。文字盤は鮮烈な深みのある青色(#3e4f65)で、サンバースト仕上げが施され、放射状に光を捉えます。金色のローマ数字、特にVIII、VI、Vが文字盤表面から浮き上がるように大きく配置されています。また、金色の分針と時針には、中央部に夜光塗料(#c3bfb5)が施されています。文字盤上部にはオープンハートデザインが施され、歯車や機構を含むムーブメントの一部が視認可能。複雑な内部構造を覗かせます。文字盤中央下部にはブランド名「PATEK PHILIPPE GENEVE」が金文字(#a6917a)で優雅に刻印。文字盤外周には微細な分目盛と小さなインジケーターが配置されています。全体的に洗練された高級感が漂い、精密なエンジニアリングと優雅なデザインが強調されている。照明は柔らかでありながら指向性があり、研磨面には繊細な反射を生み出し、質感のある要素にはハイライトを浮かび上がらせ、時計のプレミアム感を高めている。次に秒針と時計内部のムーブメントをGoogle Flowを使って動かしてみた。
それぞれが異なるスピードでかろうじて動いていますが、実際の時間の経過と秒針の動きに乖離があります。今後の課題です。
ちなみにページトップのアイキャッチ画像にあるスケルトン内部を動かそうと悪戦苦闘しましたが、結果は支離滅裂!!これは今後の夢の課題です。
PBR(Physically Based Rendering)を埋め込んだ実験用コードです。
→動画JSON Code (with PBR) コードは注意してご使用ください。
// Three.js PBR Rendering Code for Patek Philippe Watch
// Requires Three.js library: <script src="https://cdn.jsdelivr.net/npm/three@0.163.0/build/three.module.js"></script>
// Also include OrbitControls for interaction: <script src="https://cdn.jsdelivr.net/npm/three@0.163.0/examples/jsm/controls/OrbitControls.js"></script>
import * as THREE from 'three';
import { OrbitControls } from 'three/examples/jsm/controls/OrbitControls.js';
function init() {
const scene = new THREE.Scene();
const camera = new THREE.PerspectiveCamera(75, window.innerWidth / window.innerHeight, 0.1, 1000);
const renderer = new THREE.WebGLRenderer({ antialias: true });
renderer.setSize(window.innerWidth, window.innerHeight);
document.body.appendChild(renderer.domElement);
// PBR Environment Setup (HDR for realistic reflections)
const pmremGenerator = new THREE.PMREMGenerator(renderer);
pmremGenerator.compileCubemapShader();
// Load HDR environment map for PBR (replace with your HDR file URL)
new THREE.RGBELoader().load('https://example.com/hdr/environment.hdr', function (texture) {
const envMap = pmremGenerator.fromEquirectangular(texture).texture;
scene.background = envMap;
scene.environment = envMap;
texture.dispose();
pmremGenerator.dispose();
});
// Light Elements: Soft directed lighting for highlights and reflections
const directionalLight = new THREE.DirectionalLight(0xffffff, 1.5); // Main light for sunburst effect
directionalLight.position.set(5, 5, 5);
scene.add(directionalLight);
const pointLight = new THREE.PointLight(0xffffff, 1, 100); // Subtle point light for gear highlights
pointLight.position.set(0, 2, 3);
scene.add(pointLight);
const ambientLight = new THREE.AmbientLight(0x404040, 0.5); // Soft ambient for overall sophistication
scene.add(ambientLight);
// Watch Model: Simplified geometry with PBR materials
// Case: Gold polished with brushed sides
const caseGeometry = new THREE.CylinderGeometry(1.5, 1.5, 0.2, 64); // Simplified case
const caseMaterial = new THREE.MeshStandardMaterial({ // PBR Material
color: 0xba9772, // #ba9772
metalness: 0.9, // High metalness for gold reflection
roughness: 0.2, // Polished finish
envMapIntensity: 1.5 // Enhance reflections
});
const watchCase = new THREE.Mesh(caseGeometry, caseMaterial);
scene.add(watchCase);
// Dial: Deep blue with sunburst (use normal map for texture)
const dialGeometry = new THREE.CircleGeometry(1.4, 64);
const dialMaterial = new THREE.MeshStandardMaterial({
color: 0x3e4f65, // #3e4f65
metalness: 0.1,
roughness: 0.4, // Subtle texture for sunburst
envMapIntensity: 1.0
});
const dial = new THREE.Mesh(dialGeometry, dialMaterial);
dial.position.z = 0.11; // Slightly elevated
dial.rotation.x = Math.PI; // Face up
scene.add(dial);
// Strap: Brown leather with scale pattern (use texture)
const strapGeometry = new THREE.BoxGeometry(0.5, 4, 0.1); // Simplified strap
const strapMaterial = new THREE.MeshStandardMaterial({
color: 0x51342c, // #51342c
metalness: 0.0,
roughness: 0.8, // Matte leather
normalMap: new THREE.TextureLoader().load('https://example.com/alligator_texture.jpg') // Add scale pattern
});
const strap = new THREE.Mesh(strapGeometry, strapMaterial);
strap.position.y = -2.5; // Attach to case
scene.add(strap);
// Hands: Golden with luminous
const hourHandGeometry = new THREE.BoxGeometry(0.1, 1, 0.01);
const handMaterial = new THREE.MeshStandardMaterial({
color: 0xc3bfb5, // #c3bfb5
metalness: 0.7,
roughness: 0.3,
emissive: 0xc3bfb5, // Luminous glow
emissiveIntensity: 0.2
});
const hourHand = new THREE.Mesh(hourHandGeometry, handMaterial);
hourHand.position.set(0, 0.5, 0.12);
scene.add(hourHand);
// Text: Brand name (simplified as plane with texture)
const textMaterial = new THREE.MeshStandardMaterial({
color: 0xa6917a, // #a6917a
metalness: 0.8,
roughness: 0.2
});
// Use TextGeometry for actual text (requires font loader)
// For simplicity, assume a plane
const textGeometry = new THREE.PlaneGeometry(1, 0.2);
const textMesh = new THREE.Mesh(textGeometry, textMaterial);
textMesh.position.set(0, -0.5, 0.12);
scene.add(textMesh);
// Open-heart: Gears (simplified torus)
const gearGeometry = new THREE.TorusGeometry(0.3, 0.1, 16, 100);
const gearMaterial = new THREE.MeshStandardMaterial({
color: 0xba9772,
metalness: 1.0,
roughness: 0.1
});
const gear = new THREE.Mesh(gearGeometry, gearMaterial);
gear.position.set(0, 1, 0.05);
scene.add(gear);
// Camera and Controls
camera.position.z = 5;
const controls = new OrbitControls(camera, renderer.domElement);
controls.enableDamping = true;
// Animation Loop
function animate() {
requestAnimationFrame(animate);
controls.update();
renderer.render(scene, camera);
}
animate();
// Handle Resize
window.addEventListener('resize', () => {
camera.aspect = window.innerWidth / window.innerHeight;
camera.updateProjectionMatrix();
renderer.setSize(window.innerWidth, window.innerHeight);
});
}
init();
さて、ここからが今日の本題です!!
画像生成の基本原則(これを守るだけで成功率が跳ね上がる)
1. プロンプトの順番ルール
→ 重要な構図要素は一番前に置く(品質タグの後すぐ)
masterpiece, best quality, full body, dynamic angle, from below, …
2. 重み付けを積極活用
→ (構図キーワード:1.3〜1.8) で強調
特に効きが悪い構図は最後にもう一度入れる。
low angle:1.4), … low angle shot
3. カメラ用語を混ぜる
→写真・映画用語が一番安定して効く(AIが写真学習データに強いため)
主要構図Tips・おすすめプロンプト一覧(実測で効きやすい順)
・画角・写り範囲(一番大事!)
| プロンプト例 | 意味・効果 | 重み推奨 | 備考 |
|---|---|---|---|
| full body, whole body | 全身(引き) | 1.3〜1.5 | デフォルトで上半身になりやすいので必須 |
| cowboy shot | 太もも上〜頭(定番の立ち絵構図) | 1.2〜1.4 | アニメ・キャラ絵で最強 |
| upper body, medium shot | 上半身〜腰あたり | – | – |
| portrait, headshot | 胸から上(ポートレート) | – | 顔重視時 |
| close-up, face focus | 顔ドアップ | 1.3〜1.6 | 高解像度だと出にくいので**Hires推奨 |
| extreme close-up | 目・唇など超アップ | 1.4〜 | インパクト強め |
Hires とは:
低解像度で生成した画像の構図を維持しつつ、高精細にアップスケールする機能です。小さな画像で発生しやすい顔の崩れや構図の破綻を防ぎ、詳細なディテールを追加して高解像度画像を作成するために使用されます。
主なポイント
役割: 最初の低解像度生成(512×512など)後に、その画像を基に情報を補完し、解像度を高める。
メリット: 構図崩れ(2頭身化や多頭化)を避け、目が潰れたりする問題を解消し、高画質な画像を生成できる。
使い方: txt2img画面で「Hires. fix」にチェックを入れ、Upscaler(拡大モデル)やDenoising strength(再描画の強さ)を設定する。
注意点: 通常の生成より時間がかかる。Denoising strengthを高くしすぎると元の画像から変化してしまう。
Denoising strength(再描画の強さ)は0.5~0.7程度が推奨され、0.3以下では詳細が追加されず、1.0に近づくと元の画像と大きく異なる画像になってしまいます。
・カメラアングル(視点の高さ・角度)
| プロンプト例 | 効果・印象 | 効きやすさ |
|---|---|---|
| from below, low angle, worm’s eye view | 見上げる・威圧感・カッコいい | ◎◎◎ |
| from above, high angle, bird’s eye view | 見下ろす・可愛い・俯瞰 | ◎◎◎ |
| from side, side view, profile | 横顔・サイドショット | ◎ |
| from behind, back view | 後ろ姿 | ◎ |
| dutch angle, tilted angle | 斜め構図(不安定・緊張感) | ○〜◎ |
| over the shoulder | 肩越しショット(会話シーンに) | ○ |
・ダイナミック・動きを出す構図
・dynamic angle, dramatic angle, foreshortening (ダイナミックな角度、劇的な角度、短縮法)
・action shot, mid-air, jumping pose, running towards viewer (アクションショット、空中、ジャンプポーズ、カメラに向かって走る)
・diagonal composition, asymmetrical composition (斜めの構図、非対称の構図)
・(from dynamic low angle:1.5), (intense perspective:1.3) (ダイナミックローアングル:1.5)、(強烈な遠近法:1.3)
・芸術・写真の構図法則(プロっぽく仕上げる)
・rule of thirds composition(三分割法) → 被写体を画面の1/3線上に置く
・golden ratio composition leading lines(誘導線) → 道・視線・手すりなどで視線を誘導
・symmetrical composition, centered composition (左右対称の構図、中央配置の構図)
・negative space(余白を活かしたミニマリスト構図)
・複数キャラ・レイアウト指定(上級)
・two girls, side by side, facing each other(二人の少女が並んで向き合う)
・one in foreground, another in background, depth of field (一人は前景、もう一人は背景、被写界深度)
・multiple characters, different distances, layered composition (複数の被写体、異なる距離、重層的な構図)
・subject A on left third:1.2(左三分の一に被写体A:1.2)
・subject B on right third:1.2 (右三分の一に被写体B:1.2))
注意点・上級Tips
・高解像度(768px以上)だと引き構図になりやすい → close-up系はHires.fixやimg2imgで調整
・ControlNet/OpenPose併用が最強だが、プロンプトだけで頑張るなら「重み1.5以上+複数回記述」が現実解
・Flux系は自然言語が強いので
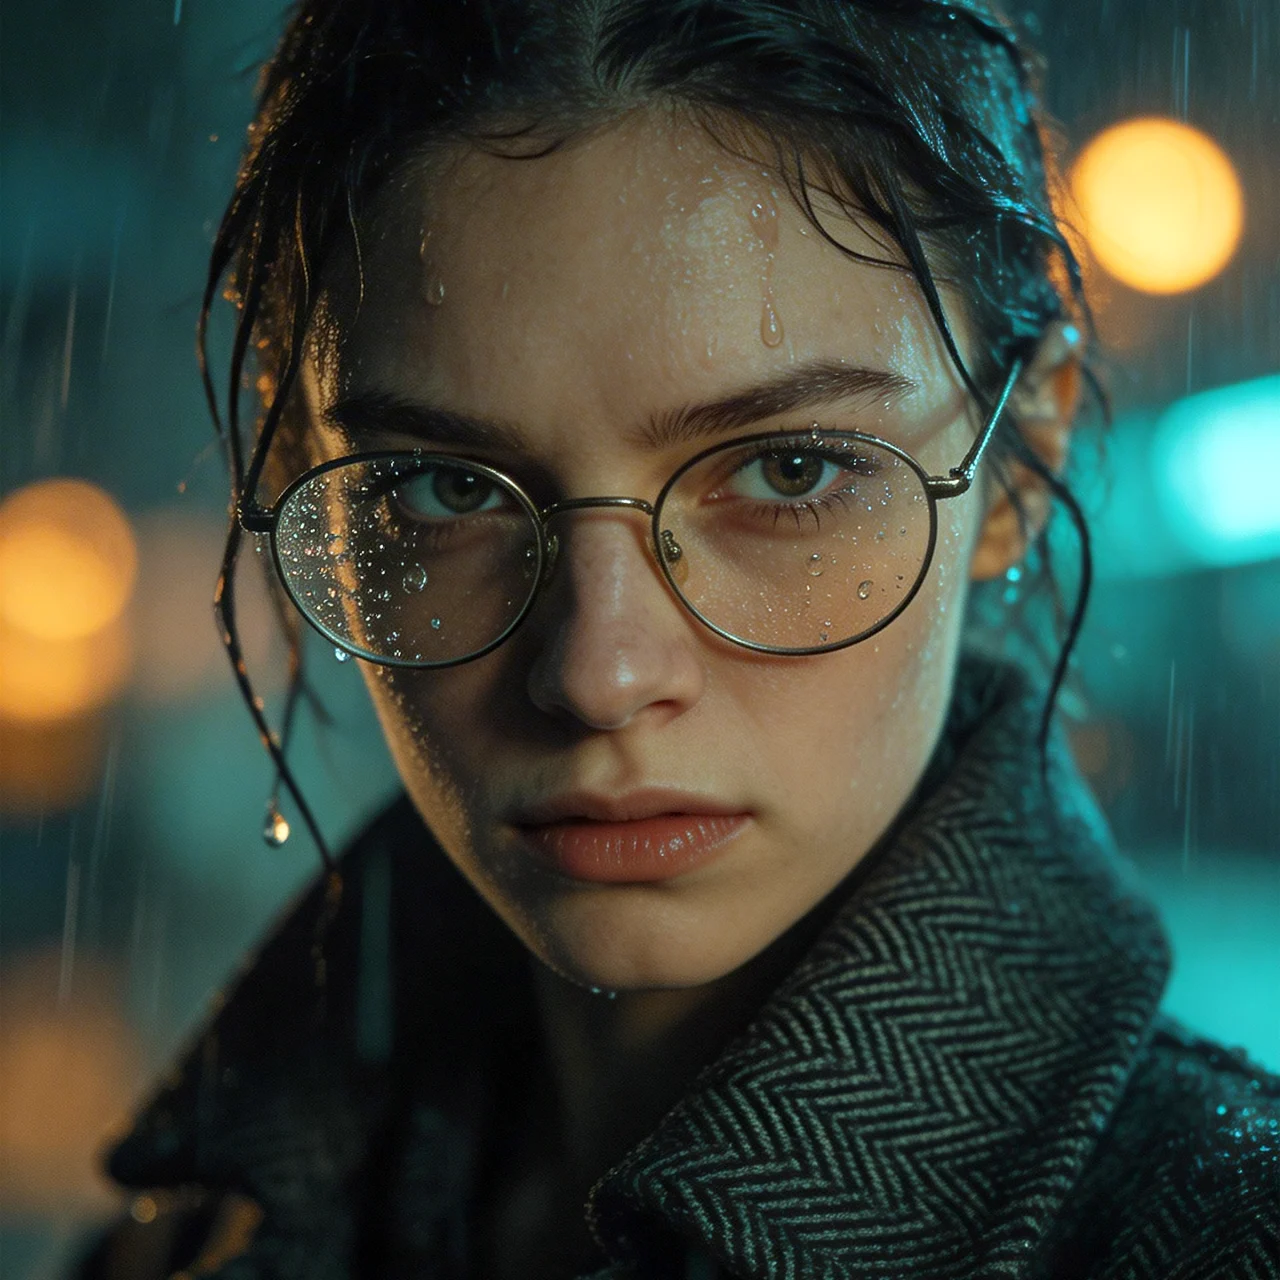
「Cinematic extreme close-up of a young woman with drenched, dark hair clinging to her temples, standing resolutely in a heavy midnight downpour.
She wears delicate round wire-rimmed glasses, with crystalline water droplets beadily clinging to the glass lenses and her skin, refracting the city lights. 」
のように要点だけを伝えて結果を検討するといった手法もまた可
これで7割くらいは狙った構図に近づけます。
自然言語によるプロンプト例 – 画角、写り範囲をテーマに
→プロンプト(日英) コードは注意してご使用ください。
Cinematic extreme close-up of a young woman with drenched, dark hair clinging to her temples, standing resolutely in a heavy midnight downpour.
She wears delicate round wire-rimmed glasses, with crystalline water droplets beadily clinging to the glass lenses and her skin, refracting the city lights.
Her expression is one of fierce determination and high-intensity focus, eyes piercing through the storm.
She is dressed in a dark, heavy herringbone wool coat with the collar turned up high against her neck; the intricate weave of the fabric is saturated and textured with moisture.
The lighting is dramatic and moody, featuring a cinematic teal and orange color grade.
The background is a masterfully blurred urban environment, transformed into a dreamy sequence of glowing amber streetlamps and deep indigo neon bokeh.
High-contrast shadows, sharp focus on the facial details and raindrops, hyper-realistic skin textures,
volumetric lighting,
shot on 35mm film, 8k resolution, photorealistic, noir aesthetic, moody atmosphere.;
激しい雨に打たれ、濡れた黒髪がこめかみに張り付いた若い女性が、深い闇の豪雨の中、断固として立ち尽くす。
繊細な丸いワイヤーフレームの眼鏡をかけ、レンズと肌に水晶のように輝く水滴が玉のように張り付き、街の明かりを屈折させている。
彼女の表情は激しい決意と集中力に満ち、嵐を貫くような眼差しだ。
首元まで高く立てた襟の、重厚なヘリンボーンウールのダークコートを纏う。複雑な織りの生地は湿気で濡れ、質感が増している。
ドラマティックで陰鬱な照明は、映画的なティールとオレンジのカラグレーディングを施されている。
背景は巧みにぼかされた都市景観で、琥珀色の街灯が輝く夢幻的なシーケンスへと変容し、深い藍色のネオンのボケが浮かび上がる。
ハイコントラストな影、顔のディテールと雨滴への鋭い焦点、超リアルな肌の質感、
ボリューム照明、
35mmフィルム撮影、8K解像度、フォトリアリスティック、ノワール美学、陰鬱な雰囲気。
光の効果をコントロールする(照明効果のプロンプトTips)
次に最新のGoogle Nano Banana 2などで照明効果を明確にコントロールするための実践Tipsをまとめます。
前の「主要構図Tips」「色変換ツール」と同じく、中級〜上級向けに「プロンプトだけで光の質・方向・ムードを操る」テクニックを中心にまとめました。照明は画像の印象を8割決める要素なので、ここを極めると一気にクオリティが跳ね上がります。
基本原則(これを守るだけで成功率が跳ね上がる)
1. 照明キーワードはプロンプトの後半〜最後の方に置く(Flux系は特に最後が効きやすい)
→ 主体・構図・スタイル → 照明 → 雰囲気 の順が鉄板
2. 重み付け必須:(cinematic lighting:1.4) や (rim lighting:1.3) で強調
3. 光源の方向・質・色温度を具体的に指定(曖昧だとランダムになりやすい)
4. 光の相互作用(影・反射・透過・ボリューム)を入れるとリアルに
5. Flux.1系は自然言語長文が強いので「光がどのように当たっているか」を描写的に書くと抜群
照明カテゴリ別・おすすめプロンプト一覧(効きやすい順)
・自然光・時間帯系(一番使いやすい・万能)
| プロンプト例 | 効果・印象 | 重み推奨 | 備考 |
|---|---|---|---|
| golden hour, warm sunlight | 夕焼け・朝焼けの暖かい黄金光 | 1.3〜1.6 | 肌・風景が美しくなる定番 |
| blue hour, cool twilight | 夕暮れ後の青みがかった神秘光 | 1.3〜 | 幻想的・クール系に |
| midday sun, harsh sunlight | 真昼の強い直射日光・硬い影 | – | コントラスト強め |
| dappled sunlight, god rays | 木漏れ日・光芒(crepuscular rays) | 1.2〜1.5 | 森・室内窓辺に最高 |
| soft diffused daylight | 曇天・柔らかい自然光 | – | ポートレート向き |
・人工照明・スタジオ系(プロ写真風に)
1. studio lighting, softbox lighting, three-point lighting
2. rim lighting, backlight, silhouette glow
3. dramatic lighting, chiaroscuro, low key lighting
4. high key lighting, flat lighting, even illumination
5. loop lighting, Rembrandt lighting, butterfly lighting(顔のライティング技法)
・特殊・雰囲気重視照明(ムード爆上げ)
| プロンプト例 | 効果・印象 | 効きやすさ |
|---|---|---|
| volumetric lighting, god rays | 光のボリューム・霧中光線 | ◎◎◎ |
| neon glow, cyberpunk neon | ネオンサインの派手な発光 | ◎◎◎ |
| cinematic lighting | 映画のようなドラマチック光 | ◎◎ |
| moody atmospheric lighting | 暗め・霧・幻想的 | ◎ |
| rim light + backlight | 輪郭光 + 逆光で神々しいシルエット | ◎◎ |
| subsurface scattering | 肌・髪・布の光透過(リアル肌必須) | 1.2〜 |
| glowing edges, halo lighting | 発光エッジ・天使の輪 | ○〜◎ |
・光の方向・角度指定(上級コントロール)
・light from left, side lighting (左からの光、サイドライト)
・llight coming from behind, backlit (背後からの光、バックライト)
・loverhead lighting, top-down light (頭上からの光、トップダウンライト)
・lunder lighting, dramatic under glow (アンダーライト、ドラマチックな下からの光)
・llight source at 45 degrees from right:1.3 → かなり具体的に方向指定可能(Fluxで特に効く)
(から45度の光源:1.3)
照明は「何の光がどこから当たって、どう反射・透過しているか」を想像しながら書くと、AIが忠実に再現してくれます。
・注意点・上級Tips
- Flux.1 / Flux.2 Pro:照明記述を最後に置き、自然言語で「light gently caressing her face from the window on the left」など描写的に書くと最高精度
Stable Diffusion系:タグ式(comma区切り)が安定。重みを1.3〜1.6で複数照明混ぜると強い
Midjourney:–stylize 600〜800 + lightingタグで芸術的に。–ar で構図と合わせて使うと良い。
光の色温度を入れるとさらに:warm lighting, cool lighting, orange tint, teal and orange
負のプロンプトに「overexposed, underexposed, flat lighting, harsh shadows」を入れると失敗の確率が低くなります。
影が弱い時は「deep shadows」「strong contrast」追加してみる。
自然言語によるプロンプト例 – 光線をテーマに
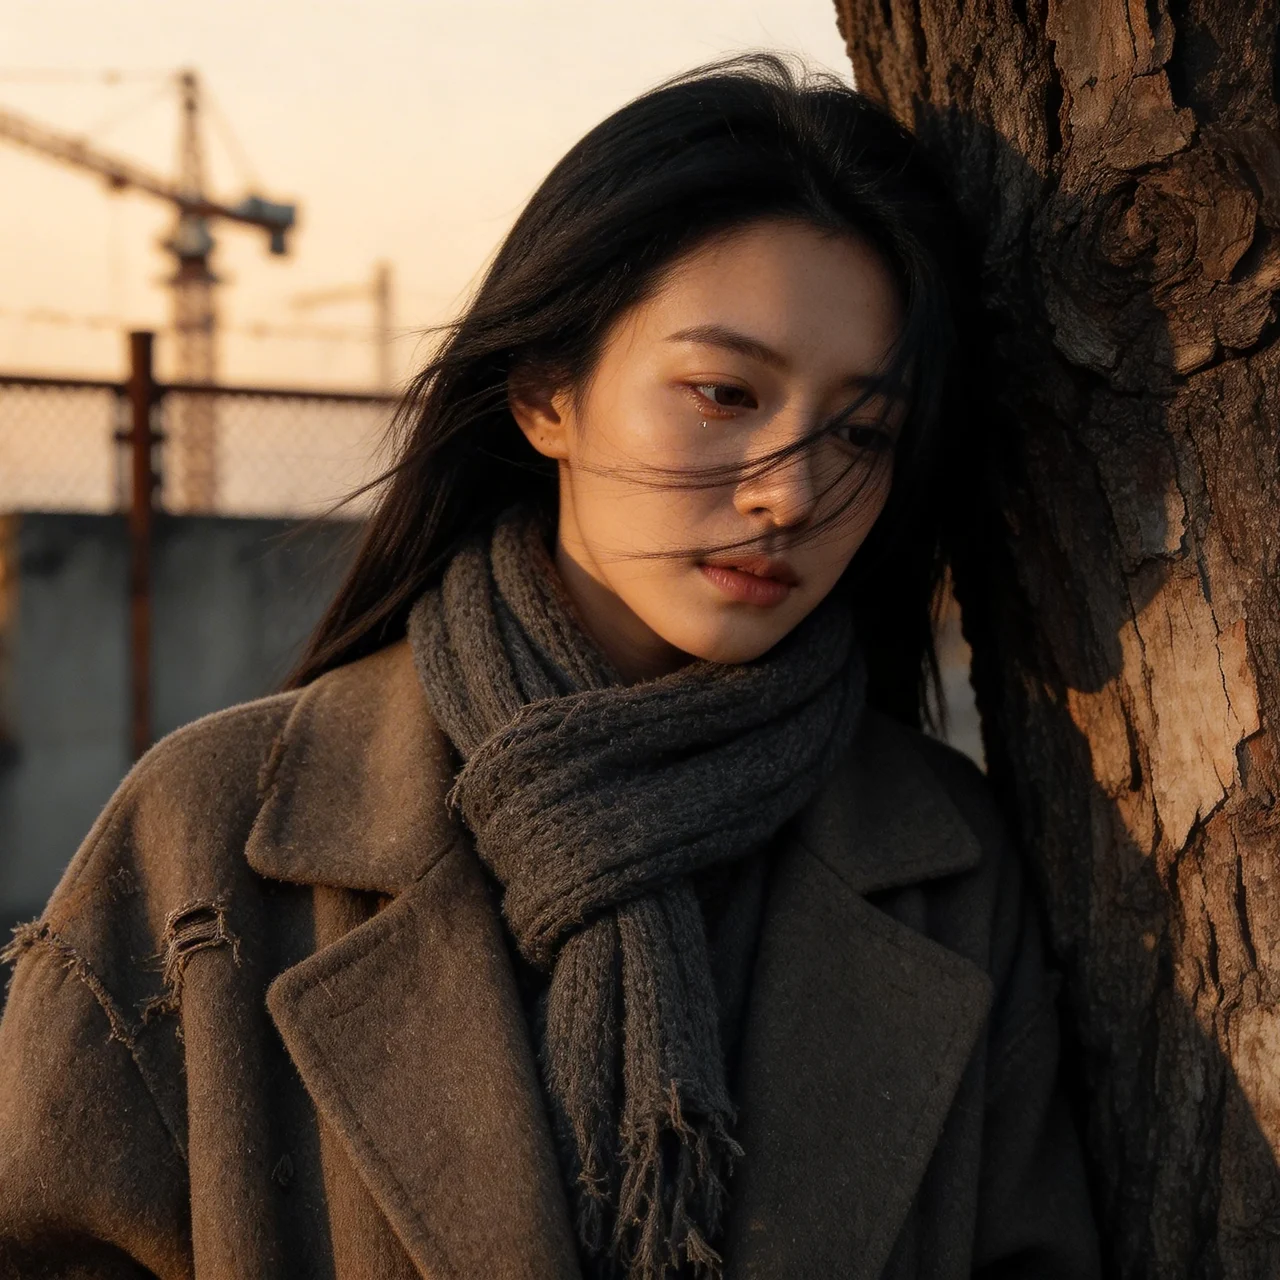
ゴールデンアワーの光の拡散効果はそれらしく表現されていますが、良くありがちなAI画像です。
表現したいのは三次元的な光の粒子の分布状態つまり空気中の微粒子の散乱形数です。まあしかし、これはこれでAI画像生成の楽しみとして良しとしましょう。
→プロンプト(日英) コードは注意してご使用ください。
Cinematic, hyper-realistic 35mm film portrait of a beautiful Japanese woman with a raw, introspective expression, leaning against the gnarled, peeling bark of a weathered ancient tree.
She is enveloped in a bulky, oversized vintage wool coat featuring heavy pilling and distressed textures, paired with a frayed, worn-out charcoal knit scarf.
Her long, jet-black hair is caught in a sudden gust of wind, strands sweeping across her face to emphasize a natural, unpolished aesthetic.
The scene is bathed in the soft, fading golden light of a late autumn sunset, creating a sharp rim light on her silhouette while casting long, evocative shadows.
The background is a blurred, industrial urban landscape composed of rusted chain-link fences, weathered concrete walls, and the distant, skeletal silhouettes of cranes.
The aesthetic is heavily inspired by 1990s grunge fashion photography, defined by a muted, desaturated color palette of earthy browns, slate greys, and deep shadows.
The image possesses a nostalgic film quality with visible grain, high contrast, and a shallow depth of field that keeps the focus on the tactile texture of the wool and the moisture in her soulful eyes.
Low-key lighting, moody, melancholic, and gritty, captured with the raw intensity of a high-end editorial spread.
映画的な、超写実的な35mmフィルムのポートレート。美しい日本人女性が、風雨に晒された古木の、節くれだった剥がれかけた樹皮にもたれかかり、生々しく内省的な表情を浮かべている。
彼女は分厚く大きめのヴィンテージウールコートに包まれている。コートには激しい毛玉とダメージ加工が施され、擦り切れて使い古されたチャコールグレーのニットスカーフを合わせている。
漆黒の長い髪が突風で乱れ、顔にかかった髪束が自然な無造作な美しさを強調している。
晩秋の夕焼けが放つ柔らかく色褪せた黄金色の光がシーンを包み込み、彼女のシルエットに鋭い輪郭光を浮かび上がらせると同時に、長く印象的な影を落とす。
背景には、錆びた金網フェンス、風化したコンクリートの壁、遠くに浮かぶクレーンの骨組みのようなシルエットがぼんやりと浮かぶ工業的な都市景観が広がる。
この美学は1990年代のグランジファッション写真から強く影響を受けており、土っぽい茶色、スレートグレー、深い影といった、くすんだ彩度の低いカラーパレットが特徴だ。
粒子が目立ち、高コントラストで浅い被写界深度が特徴のノスタルジックなフィルム質感を帯びており、ウールの質感と彼女の魂のこもった瞳の潤いに焦点が保たれている。
ハイエンドなエディトリアル・スプレッドの持つ生々しい強烈さで捉えられた、低調な照明、陰鬱で憂いを帯びた、荒削りなムード。
まとめ
JSON形式と比べると、自然言語の場合、生成モデルに意図を正しく伝える上で、限界と難しさが伴うことを改めて実感しています。
次回、記事の冒頭で触れた「PBR(Physically Based Rendering)AI画像生成における物理原理レンダリング」に正面から斬り込んでいきます。
投稿者プロフィール
-
小畑彰 1948年11月東京都中野区生まれ、血液型B型。
1. 画家Vincent van Gogh研究者として:
約40年間、画家Vincent van Goghについて、次々と発見される一次情報を精査し、私自身の視点から、Goghの本質について研究を続けている。現在、膨大な一次資料の最終チェックを進めています。
2026年秋頃より3ヵ年計画で順次公開、ペーパーメディアでの各国版出版も予定しています。
2 AIアーティストとして:
AI技術を活用して、独自のデジタルアートを創作するアーティストです。テクノロジーとクリエイティビティの交差点で、新しい表現の可能性を探求しています。『aigenart』は、私の作品やアイデアを世界に発信する場であり、AIがもたらす美しさや楽しさを皆さんと共有したいと考えています。
3. 戦争反対論者として:
20代の頃から日本国憲法第9条(戦争の放棄、戦力の不保持、および国の交戦権の否認)改憲には、強い反対の意思を堅持している。
4. mail**igenart.jp (スパム対策のため、** を @a に入れ替えてください)
最新の投稿
 JSON2026-05-21砂の穴、泥の道、岩の山 — 安部公房、タル・ベーラ、カミュが問う不条理の先に
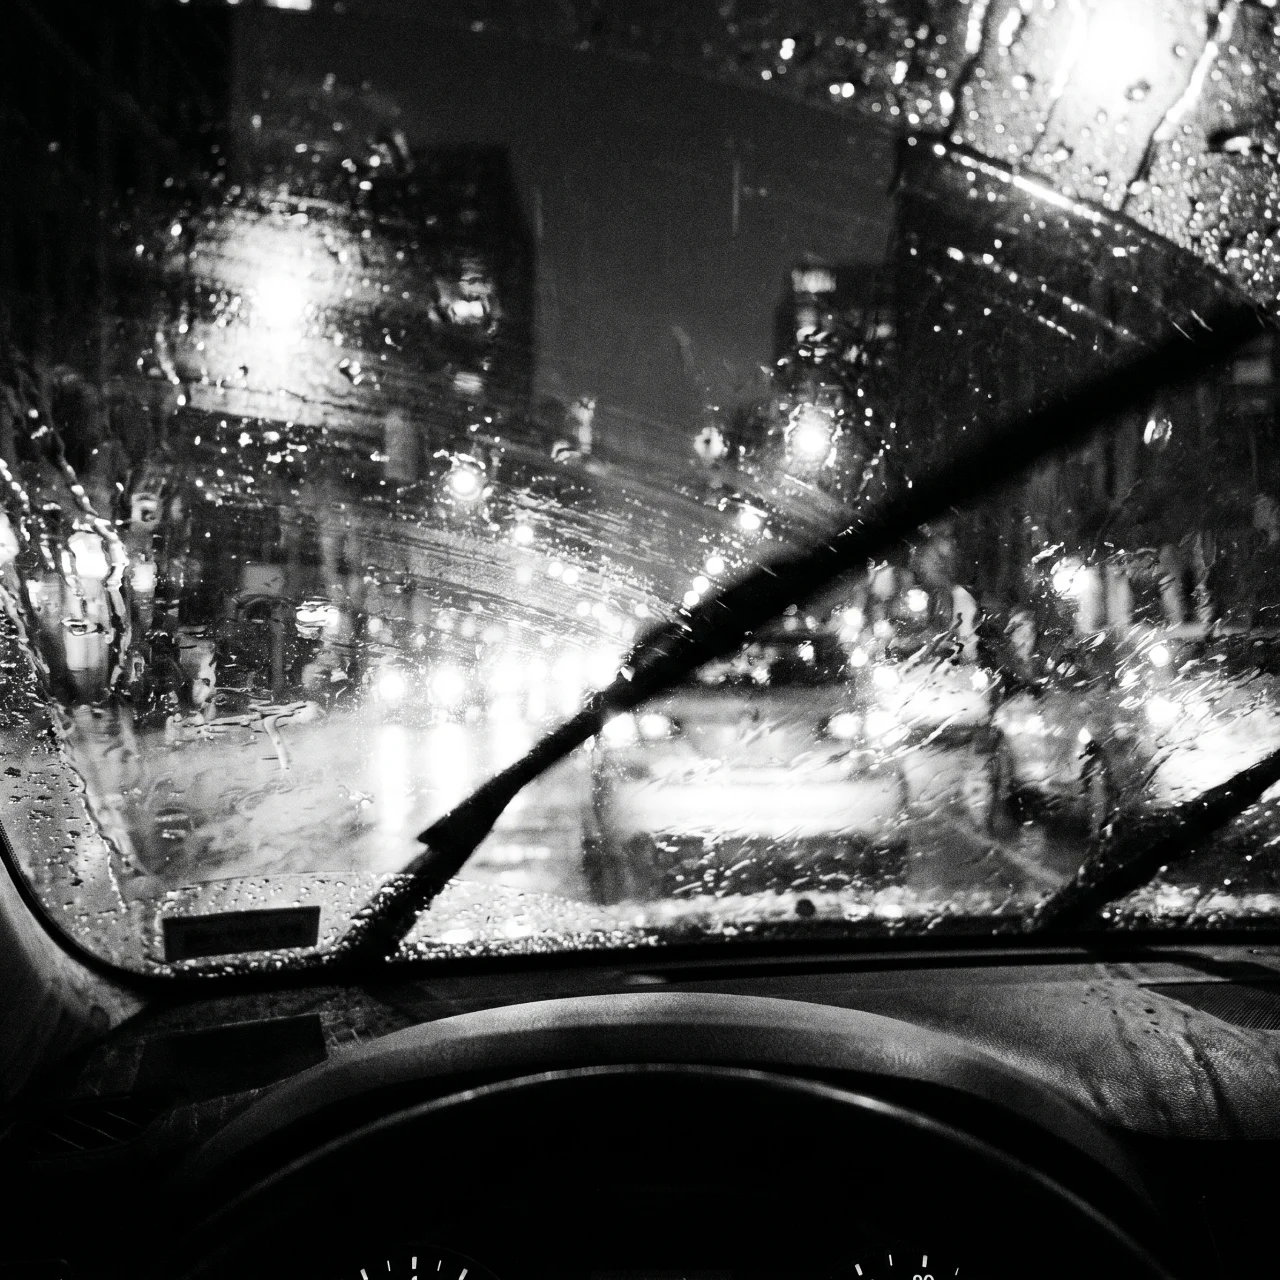 JSON2026-05-18雨の夜、フロントガラス越しのモノクローム
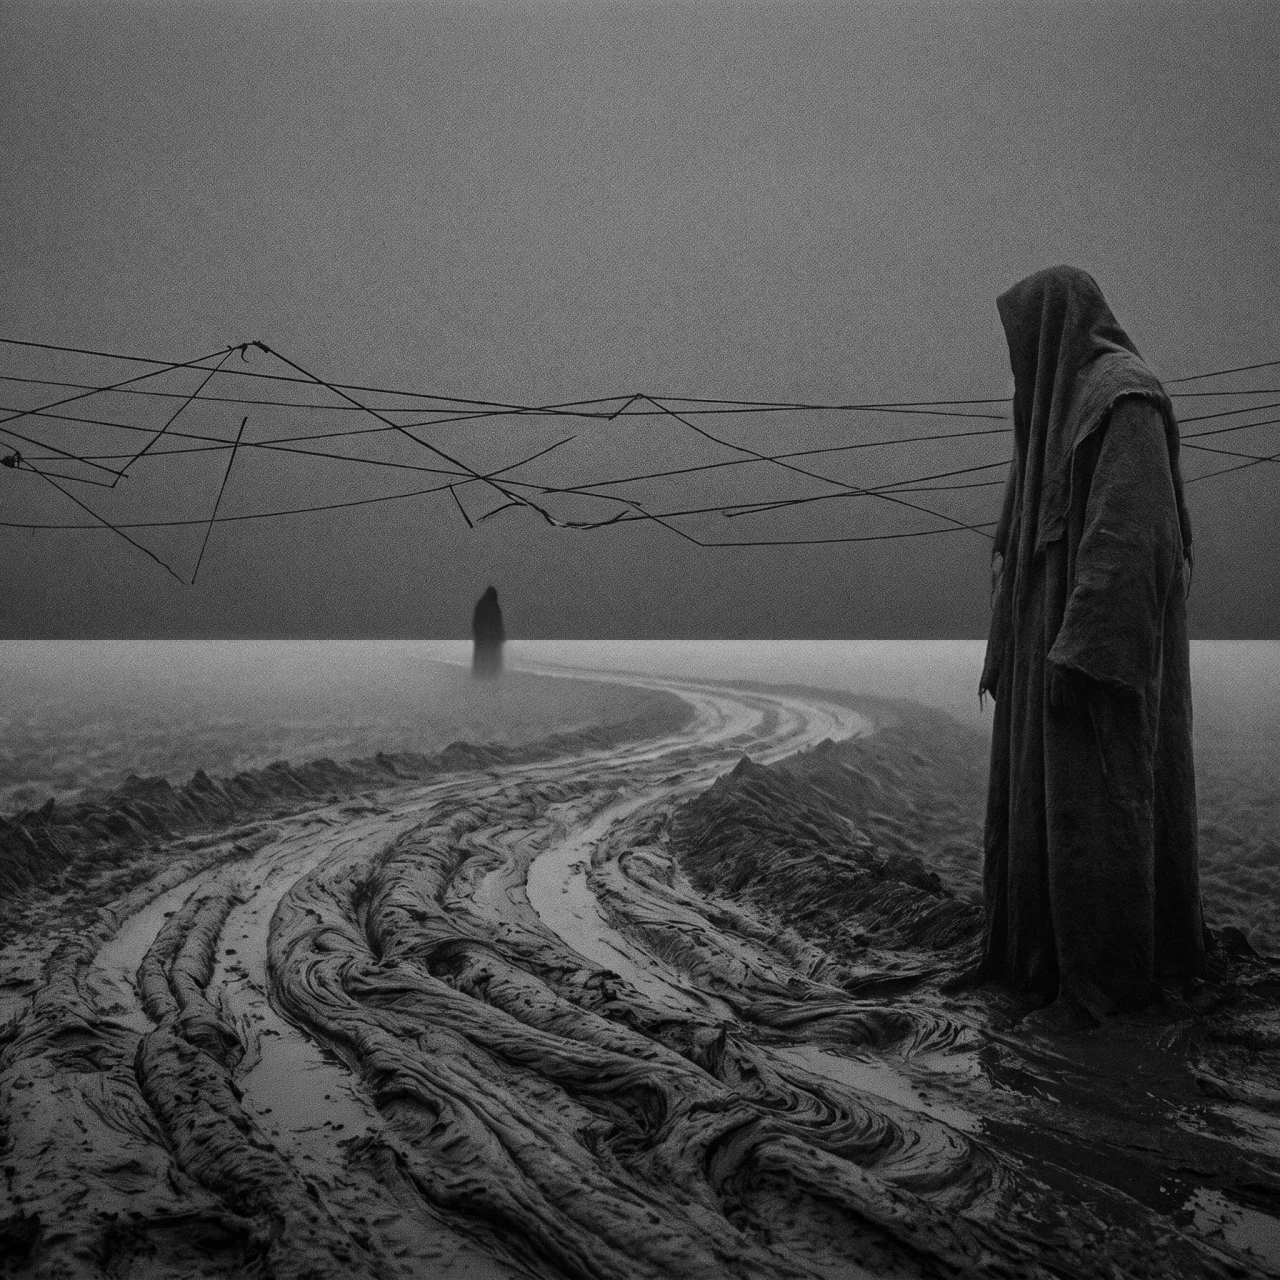 JSON2026-05-13他者(外界)への通路
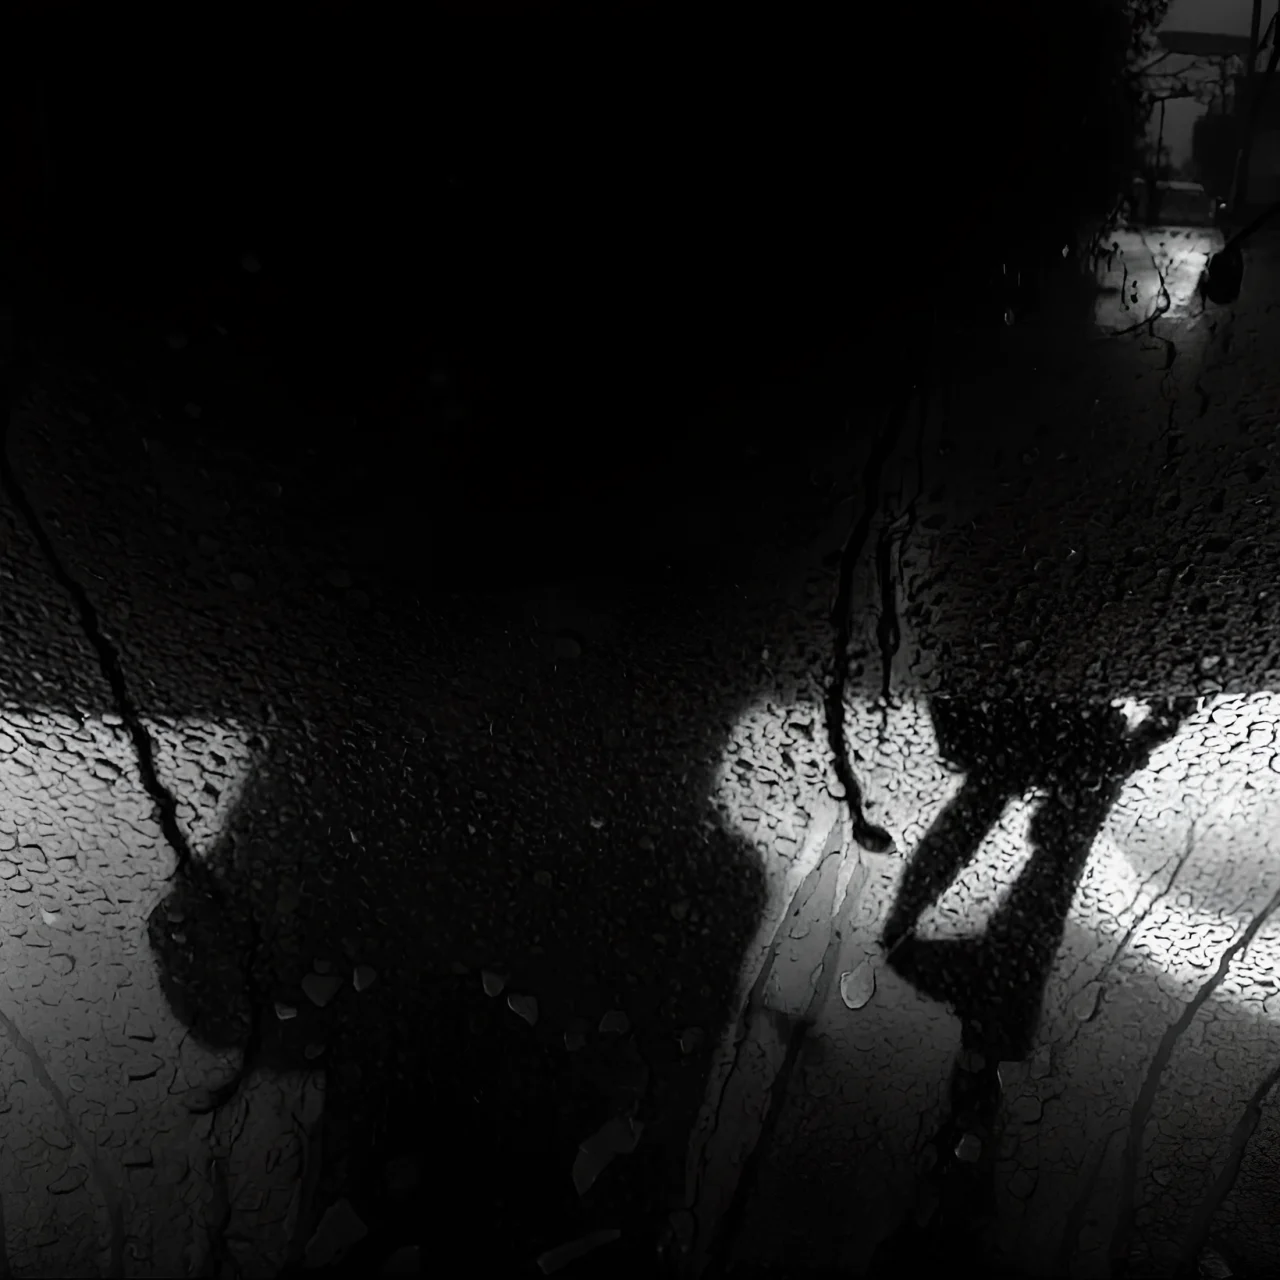 JSON2026-05-10見えない視線の恐怖